Installation Instructions
- These instructions will show you how to add the Addressfinder autocomplete to a HubSpot form. Your form should already be working well - just with manual address entry. We will enhance this form to integrate the Addressfinder widget, and enable autocompletion of verified addresses.
Before you start
- Before adding address autocompletion to your HubSpot form, we are expecting you to have the following:
- 1. A pre-existing HubSpot form with the following address elements:
- Address Line 1
- Address Line 2 (optional)
- Suburb
- City
- Postcode
- 2. You’ll need an Addressfinder licence key (any trial account will work fine).
Step by Step
- 1. Locate and open the file/area where your current HubSpot form integration lives.
- 2. Make a copy of your forms region, portalId and formId and store them somewhere nearby.
- 3. Replace the HubSpot script above (everything inside the red box) with the Addressfinder widget enriched HubSpot script code below:
Step 1. Add widget code to HubSpot form code.
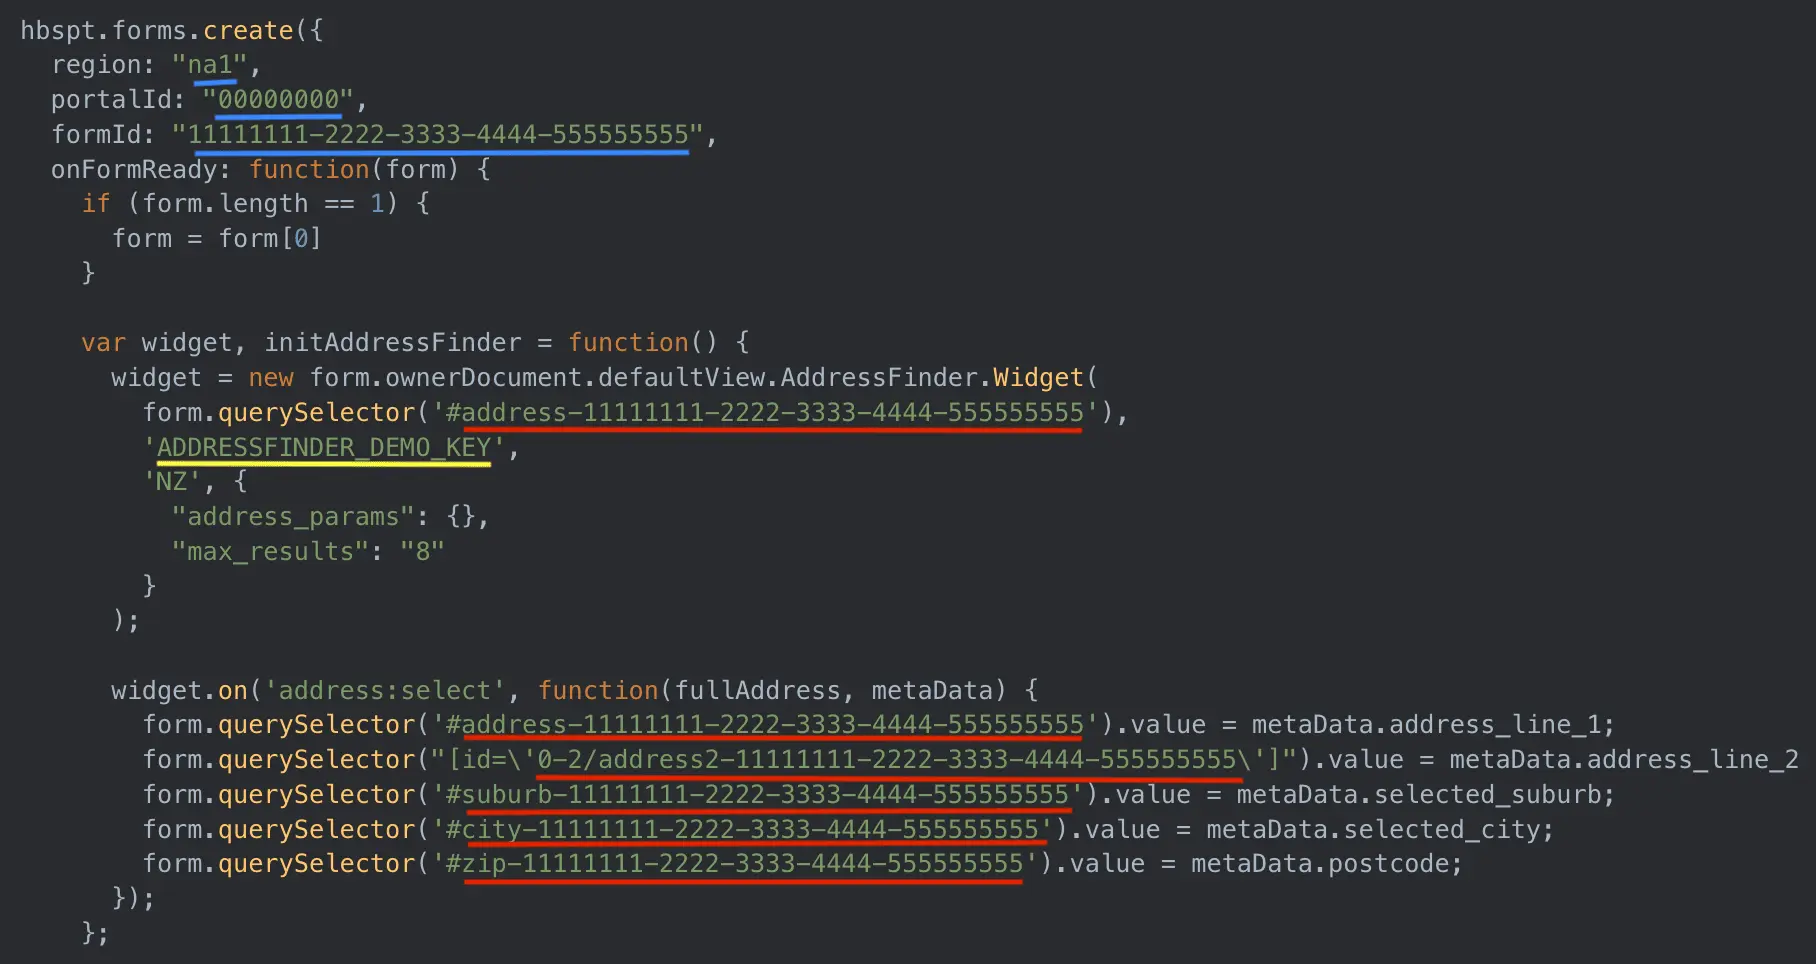
It will look something like:

  hbspt.forms.create({
    region: "na1",
    portalId: "00000000",
    formId: "11111111-2222-3333-4444-555555555",
    onFormReady: function(form) {
      if (form.length == 1) {
        form = form[0]
      }

      var widget, initAddressFinder = function() {
        widget = new form.ownerDocument.defaultView.AddressFinder.Widget(
          form.querySelector('#address-11111111-2222-3333-4444-555555555'),
          'ADDRESSFINDER_DEMO_KEY',
          'NZ', {
            "address_params": {},
            "max_results": "8"
          }
        );

        widget.on('address:select', function(fullAddress, metaData) {
          form.querySelector('#address-11111111-2222-3333-4444-555555555').value = metaData.address_line_1;
          form.querySelector("[id=\'0-2/address2-11111111-2222-3333-4444-555555555\']").value = metaData.address_line_2 || '';
          form.querySelector('#city-11111111-2222-3333-4444-555555555').value = metaData.selected_suburb;
          form.querySelector('#state-11111111-2222-3333-4444-555555555').value = metaData.selected_city;
          form.querySelector('#zip-11111111-2222-3333-4444-555555555').value = metaData.postcode;
        });
      };

      var e = document.createElement("script");
      e.src = 'https://api.addressfinder.io/assets/v3/widget.js';
      e.async = true;
      e.onload = initAddressFinder;
      form.appendChild(e);
    }
  });
Step 2. Edit the widget code
To find out the IDs of each of your address fields, right click on each one and select ‘inspect’. The element will be highlighted. Copy the ID (as per below) and paste these into the appropriate place within your generated code. Repeat for each address and metadata field.

address_params values. Use the output from the code generator to tune your addresses for allowed addresses such as PO Boxes, etc.Step 3. Save and test your form
The HubSpot form should be displayed on your test website and the Addressfinder service should activate once you start typing in the street address field.
Alternative options
The above instructions can also be applied when integrating with Addressfinder's Email or Phone verification widgets. You can also use the Address widget to collect verified addresses into a variety of different address field configurations.
To make use of an alternative option, follow the above instructions but substitute code from one of the examples below in place the code supplied in Step 1>part 3. Note, some examples make us of field types eg. input[type=email] or field names eg. input[name=phone] instead of field IDs.
- Email verification widget integration into a HubSpot form.
- Address verification widget integration into a HubSpot form (single address field)
- Address verification widget integration into a HubSpot form (four address fields)
- Address verification widget integration into a HubSpot form (five address fields)
- Address with multi-country select